
Creating a storyboard is one of the smartest ways to plan a presentation, video, or project before bringing it to life. If you’re wondering how to create a storyboard in PowerPoint, the good news is that you don’t need any special tools or design skills. PowerPoint makes it easy to map out your ideas visually, organize scenes, and structure your message clearly. In this guide, you’ll learn simple, step-by-step methods to build an effective storyboard using PowerPoint.
What is a Storyboard?
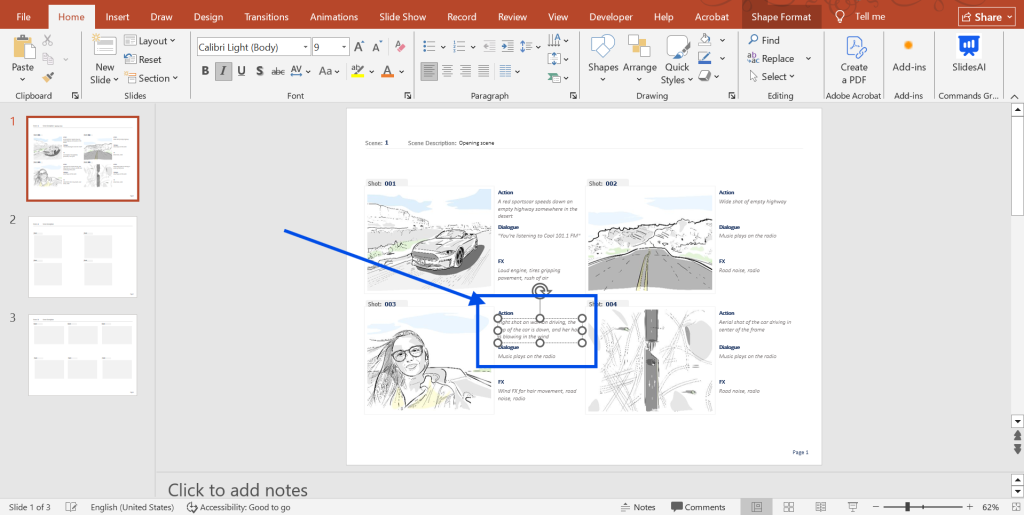
A storyboard presentation is a visual, step-by-step plan for a presentation, project, or video. It combines simple sketches or images with brief text to show how the content will flow from start to finish. Think of it as a blueprint that helps organize ideas and shape a clear, engaging message before the final version is created. Storyboards are often associated with cinema and animation, but they are widely used in marketing, training, and business presentations as well.
How to Create a Storyboard in PowerPoint? – 3 Easy Methods
PowerPoint’s user-friendly design and varied capabilities make it an ideal platform for generating storyboards. Here’s how:-
Method 1: Using Shapes for a Custom Layout (Most Popular)
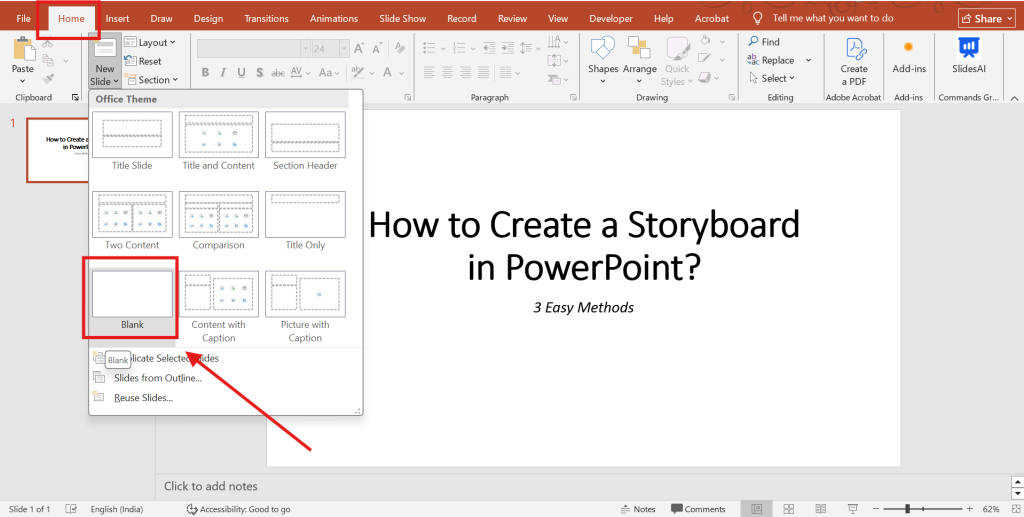
Step 1: Open PowerPoint
- Launch PowerPoint on your device.
Step 2: Create a New Presentation
- Go to File → New and choose Blank Presentation.
- If a storyboard template is available, you can use it to save time and get a ready-made structure.
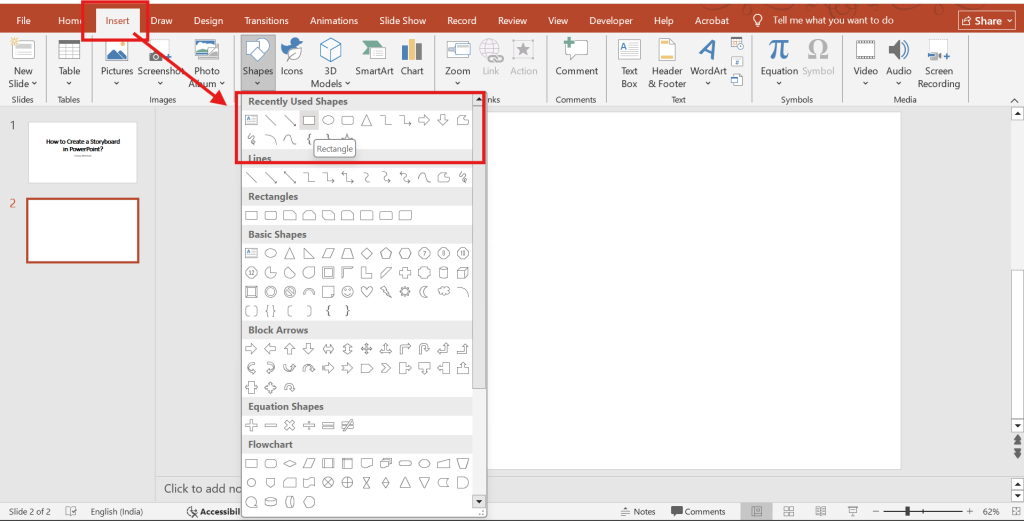
Step 3: Insert Shapes for Scenes
- Click on the Insert tab and choose Shapes.
- Use rectangles, circles, or other shapes for each scene. Rectangles are most commonly used for storyboard frames.
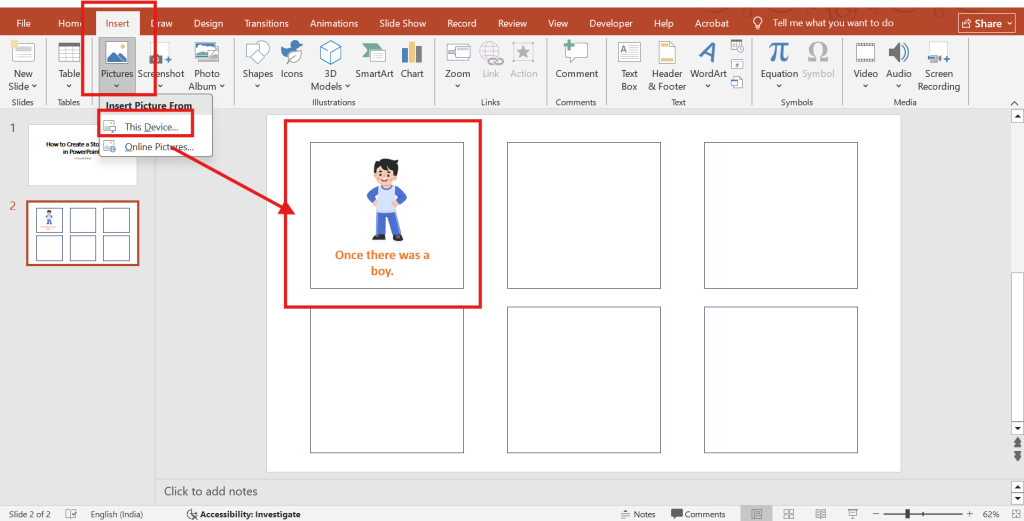
Step 4: Add Images and Text:
- Insert images or icons representing the scene’s essential aspects into each form.
- This could be a key character, setting, or object in your novel. You can also use text to explain activities, discussions, and crucial details.
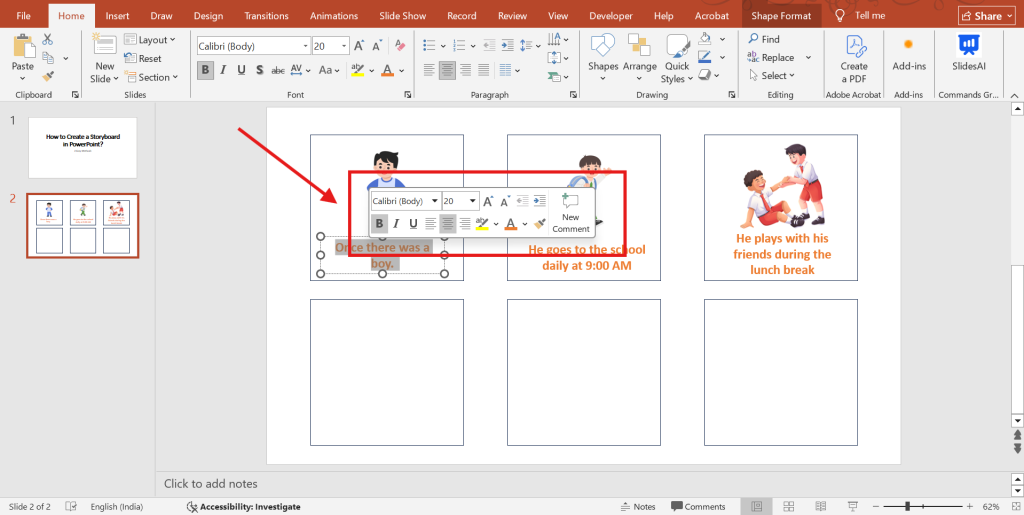
Step 5: Adjust and Style the Layout
- Arrange your shapes neatly on the slide.
- Use the Format tab to change colors, add borders, or apply simple effects. Keep fonts and colors consistent to maintain a clean, professional look.
Step 5: Review and Refine
- Go through each slide carefully.
- Make sure your visuals, text, and scene order make sense. Adjust spacing, wording, or layout if needed to improve clarity.
Step 6: Save and Share
- Click File → Save As to save your storyboard.
Create Presentations Easily in Google Slides and PowerPoint
14M+Installs

Method 2: Using Tables for a Grid Layout (Fastest)
Step 1: Start a Blank Presentation
- Open PowerPoint and choose Blank Presentation.
- Set the slide size (like 16:9 for video) by going to Design → Slide Size.
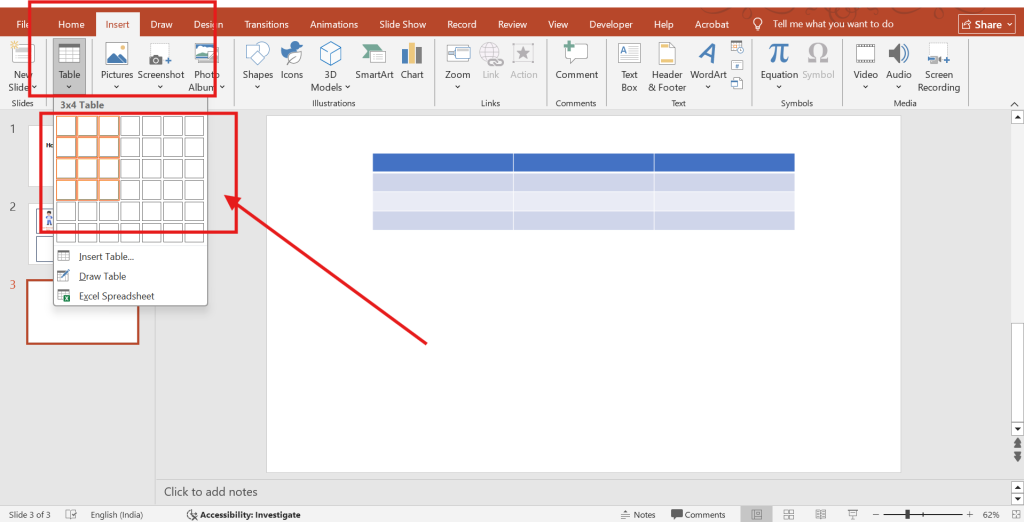
Step 2: Insert a Table
- Go to Insert → Table and choose a layout like 3×2 or 4×2.
- Each cell will represent one scene.
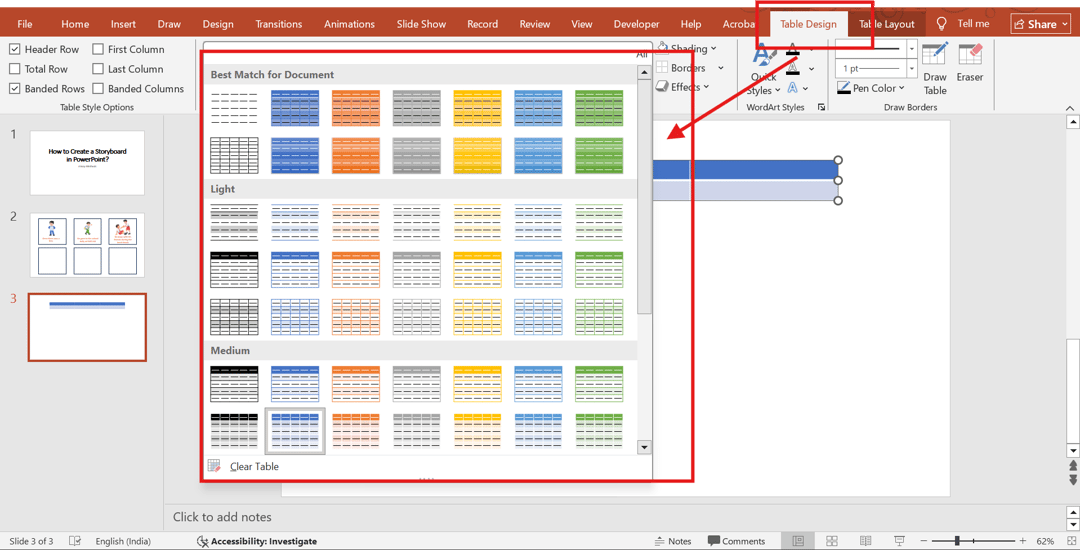
Step 3: Style the Grid
- Remove the table fill (make it transparent).
- Keep thin borders so each scene box is clearly separated.
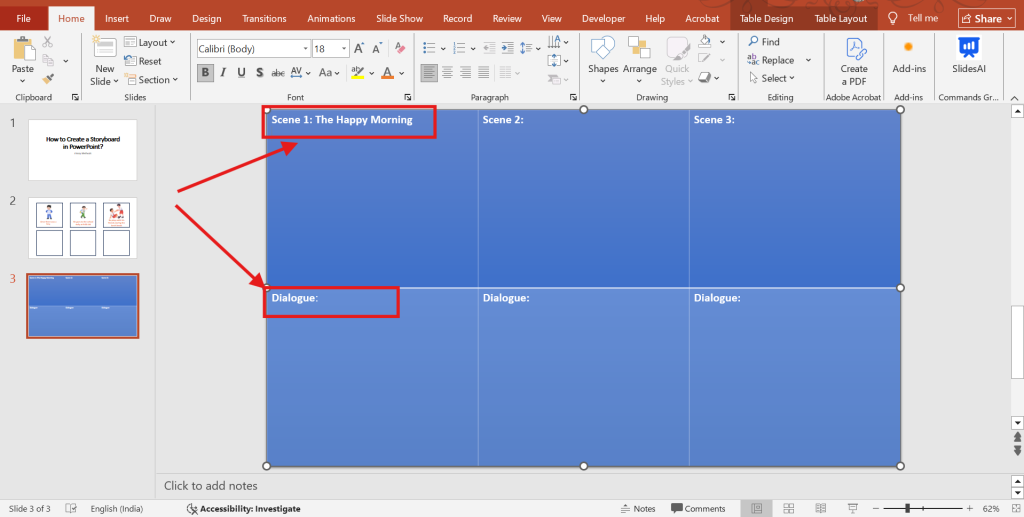
Step 4: Add Scene Labels
Below each box, add text such as:
- Scene #
- Visual / Action
- Dialogue / Voiceover
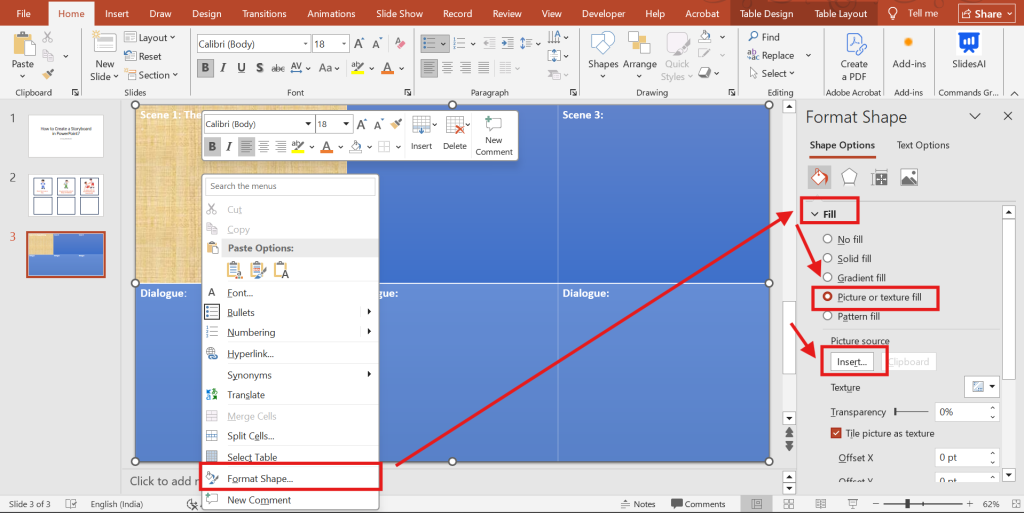
Step 5: Insert Visuals
- Right-click inside a cell and use Format Shape > Fill > Picture or Texture fill to add storyboard sketches or placeholder images.
Method 3: Using PowerPoint Storyboard Template
If you prefer to start with a template, PowerPoint makes this procedure simple.
Step 1: Open PowerPoint
- Launch PowerPoint on your device.
- Go to the main dashboard to start a new project.
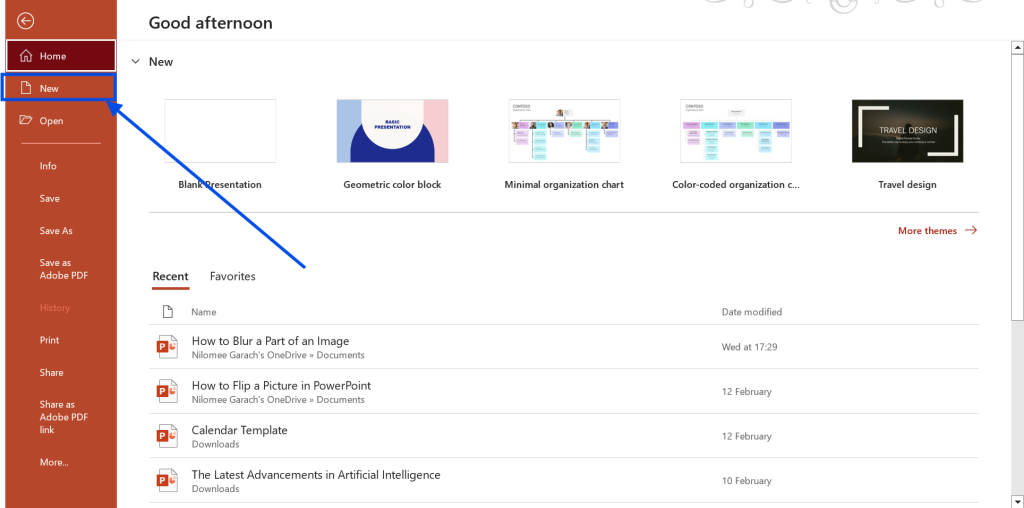
Step 2: Search for a Storyboard Template
- Click File → New.
- Type “storyboard” in the search bar.
- Browse the available template options.
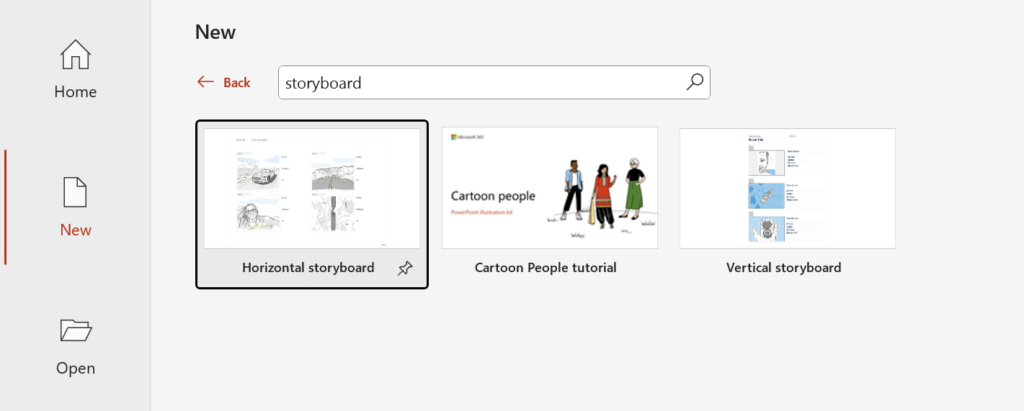
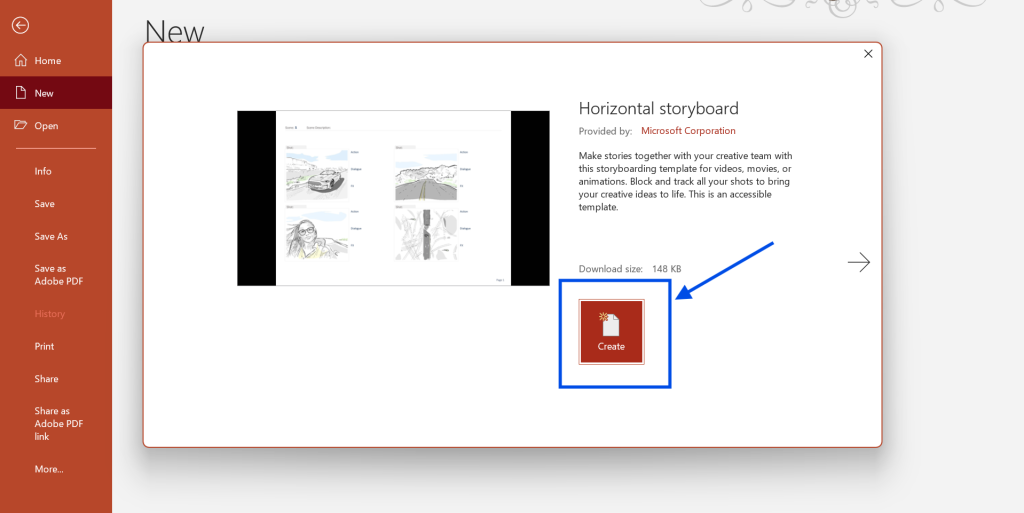
Step 3: Select and Create
- Choose a template that fits your project needs.
- Click Create to open the template.
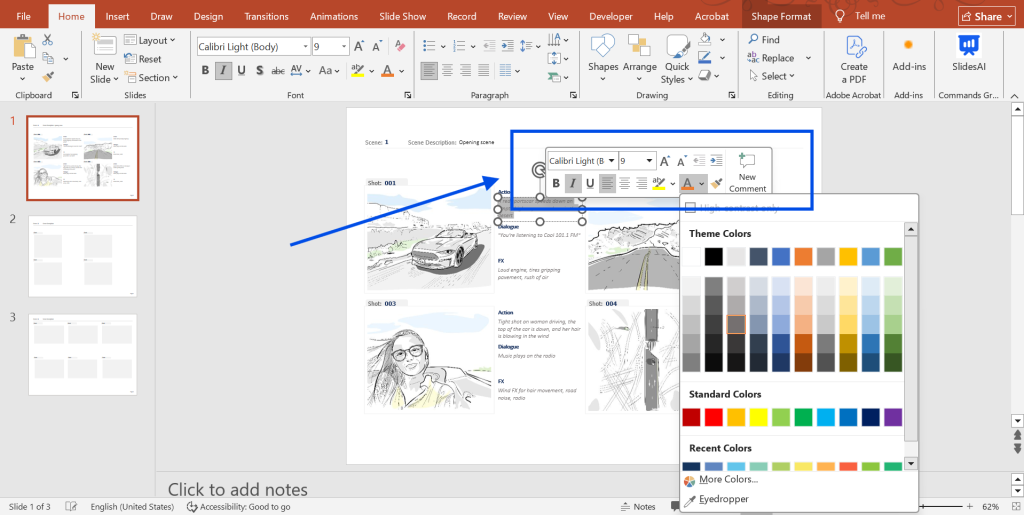
Step 4: Customize the Template
- Adjust colors and fonts to match your brand or style.
- Modify layout elements if needed.
- Ensure consistency across all slides.
Step 5: Add Your Content
- Insert images, icons, or sketches for each scene.
- Add text for descriptions, dialogue, or notes.
- Arrange slides in a logical sequence.
Step 6: Review and Edit
- Check each slide for clarity and alignment.
- Refine wording and visuals where necessary.
- Ensure the story flows smoothly from start to finish.
Step 7: Save and Share
- Click File → Save As to save your storyboard.
- Share the file with your team or stakeholders for feedback.
Also Read – How to Create a Word Cloud in PowerPoint?
Tips for Creating Engaging PowerPoint Storyboard
Creating a compelling storyboard requires a balance of creativity, strategy, and clarity. The following tips will help you build your storyboard more effectively while avoiding common mistakes that can weaken your presentation.
- Start with a Clear Goal – Know the purpose of your presentation. Define your main message before planning individual scenes or slides.
- Keep It Simple – Avoid overloading each frame with too much text or detail. Focus on key ideas and main visuals.
- Plan the Flow First – Arrange your content in a logical order, including the introduction, main points, and conclusion. Make sure each scene connects naturally to the next.
- Use Consistent Structure – Keep fonts, colors, and layout styles consistent. This makes your storyboard easier to read and more professional.
- Add Notes for Clarity – Include short descriptions, speaker notes, or instructions so others understand your idea without explanation.
- Review and refine – Review the entire storyboard. Check if the story flows smoothly and if the message is clear.
Conclusion
Creating a storyboard in PowerPoint is an effective approach to visualize and organize your ideas. Whether you use a blank presentation or a template, the methods indicated above help you create an intriguing and effective storyboard. Remember to make it simple, brief, and visually appealing for effective communication and collaboration.
Create Storyboards Faster with SlidesAI
If you want to speed up the storyboard creation process, tools like SlidesAI can help. SlidesAI is an AI PowerPoint generator that turns your text into structured, well-designed slides within minutes.
Instead of building every slide manually, you can paste your script or outline into the SlidesAI web app or Microsoft PowerPoint add-in, and it will automatically generate well-structured slides with appropriate formatting and layouts. This is especially useful when your content is ready, but you need help turning it into a visually organized presentation.
You can then refine the generated slides, rearrange scenes, and add custom visuals to turn them into a polished storyboard. It’s a great option for marketers, educators, and teams who want to save time while maintaining clarity and structure in their presentations.
Build Stunning Slides in Seconds with AI
- No design skills required
- 3 presentations/month free
- Don't need to learn a new software

Frequently Asked Questions About Creating a Storyboard in PowerPoint
Can I use PowerPoint templates for storyboarding?
Yes, you can use pre-designed templates or develop your own. This adaptability allows you to modify your storyboard to your project requirements.
How do I share storyboards created in PowerPoint?
Your storyboard can be exported as a PDF or image, shared via cloud storage, or shown straight in PowerPoint. This versatility guarantees that your audience can view your storyboard in a variety of forms.
What are any other tools for storyboarding?
Storyboard Pro and Celtx are examples of dedicated storyboarding software, as are Miro and Figma digital whiteboards. These technologies can be especially beneficial for more complex undertakings.
Can I create animated storyboards in PowerPoint?
While PowerPoint allows you to make basic animations, specialist animation software is preferred for more complicated animations. These features help you present a more polished and professional appearance.
How do I organize storyboard frames in PowerPoint?
Slides should be arranged in the desired order, with slide transitions taken into account and relevant items within a grouped frame. A well-organized storyboard improves your audience’s overall experience.
Where can I make a storyboard for presentations?
You can create a storyboard using tools like Microsoft PowerPoint, Google Slides, or Canva. PowerPoint is especially popular because it makes it easy to visually plan scenes using shapes, images, and notes.

