You’ve got a great slide deck going — solid content, good layout. But something still feels a little off.
More often than not, it’s the images. Sharp, boxy corners on photos can make even a well-designed slide look dated or rigid. A simple tweak like rounding those edges can instantly give your presentation a cleaner, more modern feel without redesigning anything from scratch.
The good news? Google Slides makes it surprisingly easy to do.
Whether you want a quick fix right inside the app, a shortcut through ready-made templates, or full control using third-party tools before uploading, there’s a method that fits how you work. In this guide, you’ll learn all three ways to round the corners of a photo in Google Slides, step by step, so you can pick the one that suits your workflow and get back to building slides that actually look the part.
Why round the image corners in Google Slides?
Rounding image corners can make your slides look cleaner, more modern, and visually balanced. It is a simple design change that helps images blend better with the rest of your presentation.
- Create a Modern Look: Rounded corners give images a softer and more polished style than sharp edges.
- Improve Visual Balance: They help images fit naturally with shapes, icons, and other design elements on the slide.
- Make Slides Feel Less Cluttered: Soft edges reduce the harsh look of multiple rectangular images and create a cleaner layout.
- Highlight Important Images: Rounded corners can make selected images stand out and feel more intentional in the design.
- Match Brand or Design Style: Many modern websites and presentations use rounded elements, so this style keeps your slides consistent.
How to Round the Corners of an Image in Google Slides?
There are three ways in which you can round the edge of a photo in Google Slides. The first is within the application itself, the second is using predesigned SlidesAI templates, and the third is through third-party tools. Below is a step-by-step guide to help you get started:
Method 1: Directly from Google Slides
- Step 1: Start by uploading your image and placing it in your document, slide, or project where you want to work on it.
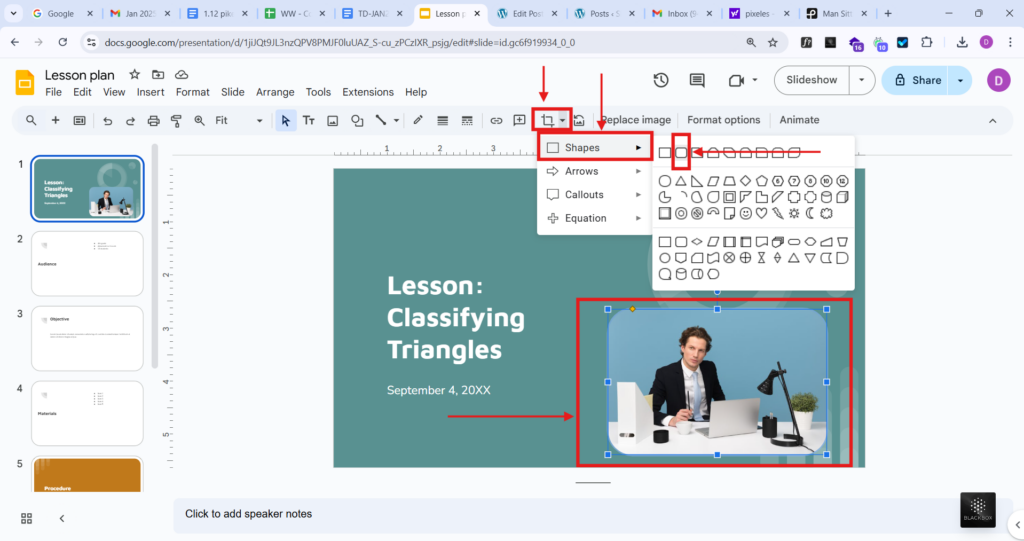
- Step 2: Select the image, then look for the crop tools.
- Step 3: Choose the option to apply a mask and select the rounded rectangle shape. This will give your image those smooth, rounded edges.
- Step 4: Adjust the corners to get just the right level of roundness, that is, just soft enough to stand out but not overly exaggerated.
- Step 5: Resize or reposition your image if needed, and you are all set with a polished, professional look.
Also Read: How to Crop Images into Custom Shapes in Google Slides
Method 2: Using Predesigned SlidesAI Templates
- Step 1: Start by downloading the SlidesAI template that suits your needs.
- Step 2: Upload the template to Google Slides and open it to start customizing.

- Step 3: Click on any existing image in the template, then choose “Replace Image” to swap it with one of your own.
- Step 4: Update the text, visuals, and other elements to fit your specific requirements and make it uniquely yours!
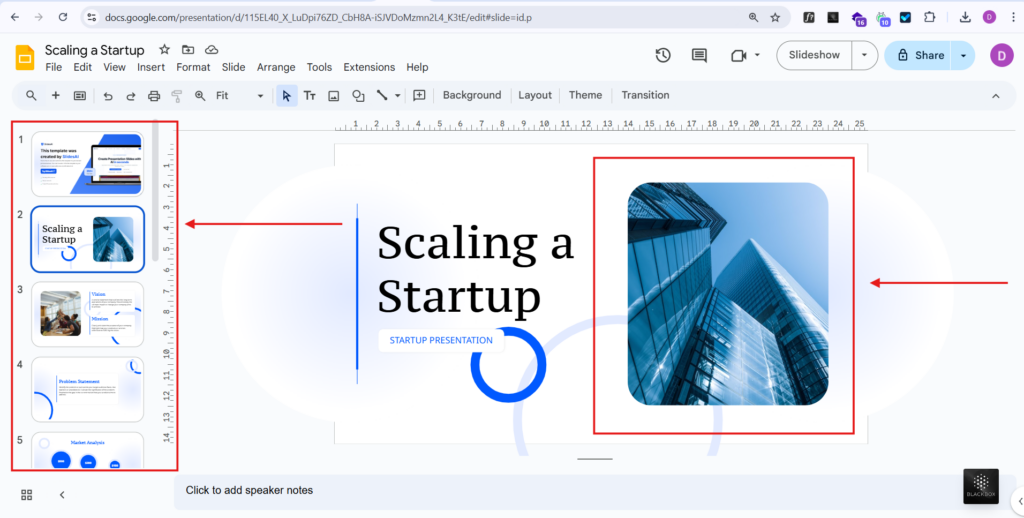
Here are some predesigned Slides AI templates that give you round edges of an image
Build Stunning Slides in Seconds with AI
- No design skills required
- 3 presentations/month free
- Don't need to learn a new software

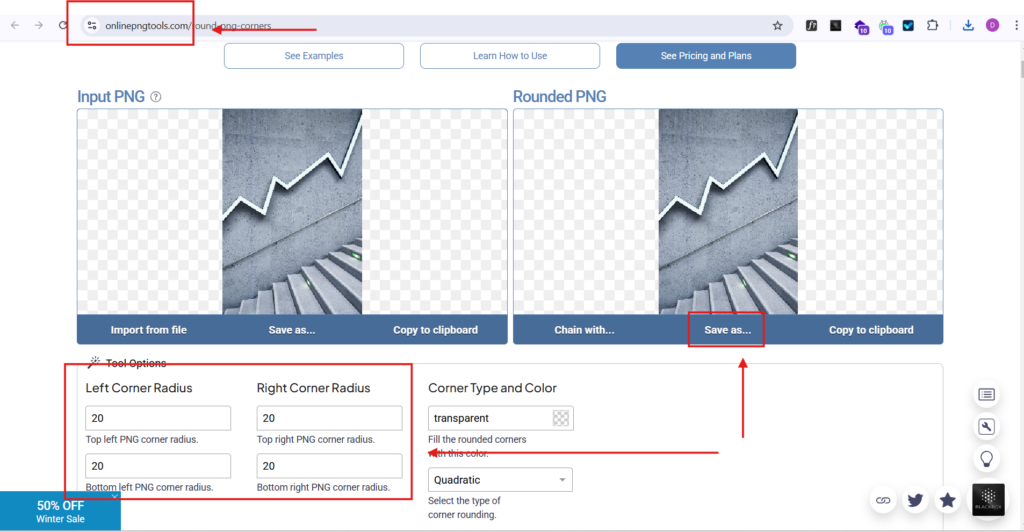
Method 3: Using Third-Party Tools
- Step 1: Open a third-party tool like Pine Tools or Online PNG Tools.
- Step 2: Select the image you want to edit and upload it to the tool.
- Step 3: Use the slider or settings to round the corners to your liking, then download the finished image.
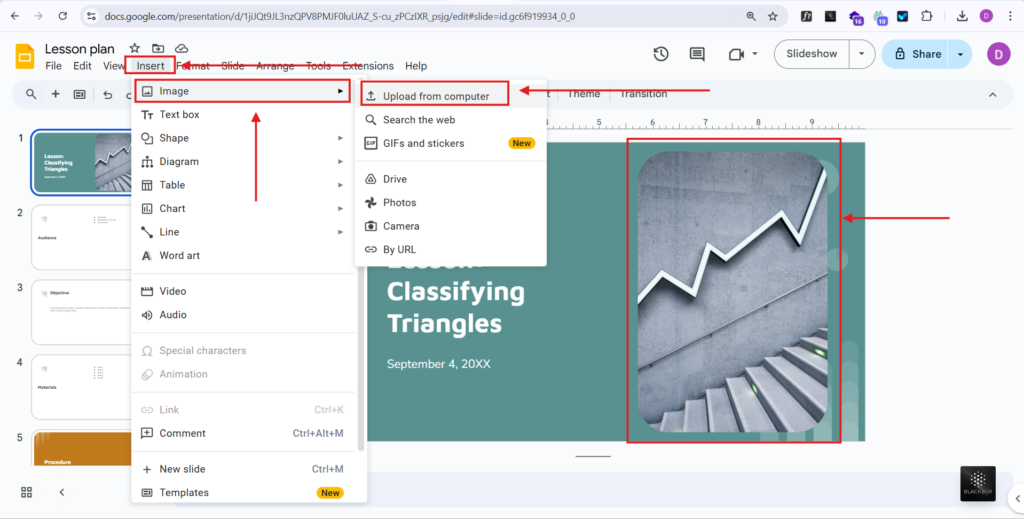
- Step 4: Open your Google Slides presentation, go to “Insert > Image > Upload from Computer”, and add your rounded-corner image to your slide.
Also Read: Best AI Image Generators to Elevate Your Presentations
Troubleshooting Common Issues with Rounding Corners of the Image
If image corners are not appearing the way you expect in Google Slides, these quick fixes can help.
- Rounded Corners Option Not Showing: Make sure the image is selected first, then open the crop options to access mask shapes.
- Corners Look Uneven: Resize the image proportionally and reapply the rounded shape for a balanced look.
- Image Gets Cropped Incorrectly: Double-click the image and adjust the crop area so important parts stay visible.
- Quality Looks Blurry: Use a higher-resolution image before applying edits or resizing.
- Rounded Image Won’t Resize Properly: Drag from the corner handles instead of side handles to keep the shape consistent.
- Changes Not Saving: Refresh the presentation or check your internet connection, then try again.
Conclusion
Rounding the edges of a photo in Google Slides is a quick and easy way to give your presentation a more polished, professional feel. It is a simple trick that can make your slides look more polished without much effort. Once you get the hang of it, you will see how easy it is to experiment with different shapes and styles to fit your design preferences. To elevate your presentation design even further, consider exploring a free AI presentation maker for effortlessly creating stunning and engaging slides.
Create Presentations Easily in Google Slides and PowerPoint
14M+Installs

Frequently Asked Questions
1. Can I adjust how rounded the corners are in Google Slides?
Yes. After applying the rounded rectangle mask to your image, you can click the image and drag the yellow corner adjustment handle (if available) to customize the roundness. If the handle isn’t visible, try resizing the image—more padding often results in smoother curves.
2. Will rounding the corners of an image reduce its quality?
No, rounding corners does not reduce image quality in Google Slides. However, resizing the image too much (especially enlarging it) may cause pixelation. Using a high-resolution image from the start ensures the best results.
3. Can I apply rounded corners to multiple images at once?
Google Slides doesn’t offer a direct feature to batch edit images. However, you can copy and paste the style from one rounded image to another.
4. Is there a way to remove the rounded corners later?
Yes. Just select the image again, click the Crop → Shape tool, and choose the rectangle shape. This will return your image to its original, sharp-cornered format without needing to re-upload it.
5. When should I use rounded images in presentations?
- Rounded images work well for:
- Profile photos
- Product showcases
- Modern minimal slide designs
- Soft, friendly, or creative presentation themes
Straight edges are better for more formal or data-heavy slides. Choosing the right style depends on your presentation tone.